I’ve been working primarily on Apple computers for many years, but every now and then I run into situations where I simply need Windows. Usually it happens when I’m testing something, preparing an installer for the Czech localization of Lightroom on Windows, or when I need to run a piece of software that just doesn’t exist for macOS.
The old Intel days
Back when Apple machines still used Intel processors, this was incredibly easy. All you needed was a separate disk partition and a standard Windows installation via Boot Camp. It ran fast and without any drama.
Alternatively, there were virtualization tools like Parallels and VMWare Fusion. Inside Adobe, Fusion used to be the corporate standard, so that’s what I occasionally used as well.
And then came Apple Silicon…
Over the past two years, I considered buying a Parallels license several times, but given how rarely I actually needed Windows, I could never quite justify it.
So I was genuinely surprised to discover that after VMWare was acquired by Broadcom, VMWare Fusion became available for free for personal, educational, and even commercial use.
That was enough reason to finally give it a try.
Registering with Broadcom – the only real hurdle
To download Fusion, you need to create an account on the Broadcom Customer Support Portal. The process isn’t exactly intuitive, and it took me a moment to figure out where everything is, but eventually the registration went through without major issues.
Many online articles still reference VMWare Fusion 13, but as of November 2025, the current version is VMWare Fusion 25H2.
And yes, it really doesn’t require any license key anymore. Just the Broadcom account.
Installation process
Once you download the installer, the setup is straightforward:
- Agree to the license terms.
- Grant Fusion access to macOS Accessibility, which is required for proper keyboard and mouse handling.
- Choose which version of Windows you want to install. Fusion will automatically download the correct ISO directly from Microsoft.
- When prompted for boot firmware, select UEFI and set a password. Make sure to save it somewhere — it isn’t stored in the macOS keychain, and you may need it later.
- Adjust the virtual machine settings:
- RAM allocation
- number of CPU cores
- virtual disk size
- other preferences
After that, you can start installing Windows. The process is essentially identical to installing it on a regular PC.
First launch of Windows
Once Windows boots for the first time, there’s one important step:
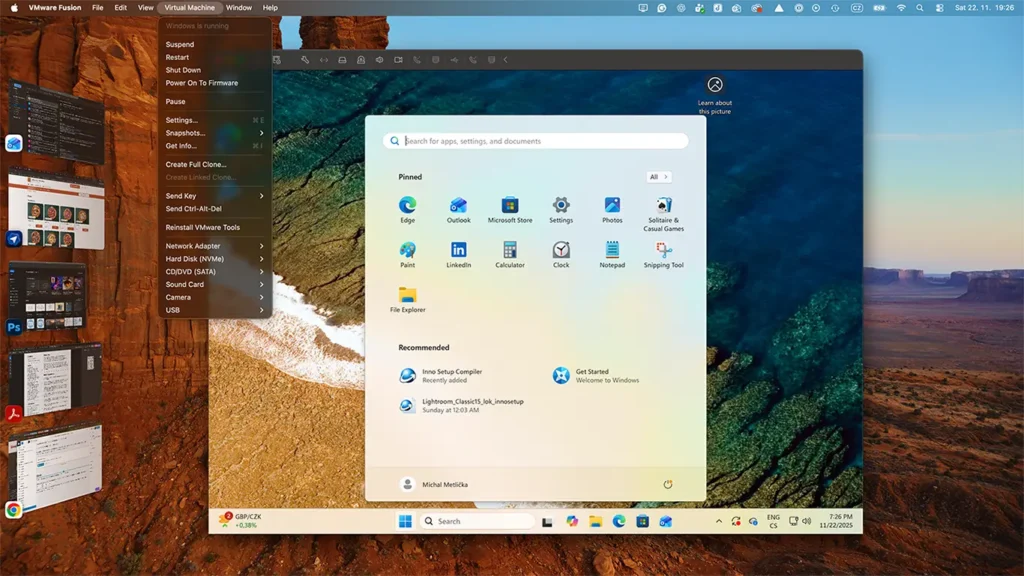
Fusion → Virtual Machine → Install VMWare Tools
This installs drivers and integrations that significantly improve the Windows experience on a Mac, including things like better display handling, clipboard sharing, and smoother input.
Conclusion
After a week of using it, I’m pleasantly surprised.
Windows runs smoothly, integration with macOS is good enough for my needs, and most importantly: I no longer need to buy Parallels for the occasional Windows task.
If you also need Windows from time to time but don’t want to invest in Parallels, VMWare Fusion might be exactly what you’re looking for. I hope this short experience helps someone else save time and effort.